There are some foods that just feel like a warm hug, and a classic grilled cheese is definitely one of them. But what if you could take that comforting, gooey, cheesy magic and turn it into a fun, dippable, snackable treat? This Grilled Cheese Roll Ups Recipe does exactly that. It transforms the humble sandwich into something truly special, perfect for after-school snacks, a fun lunch, or even a crowd-pleasing party appetizer. They’re crispy on the outside, wonderfully melted on the inside, and just begging to be dunked into a warm bowl of tomato soup.
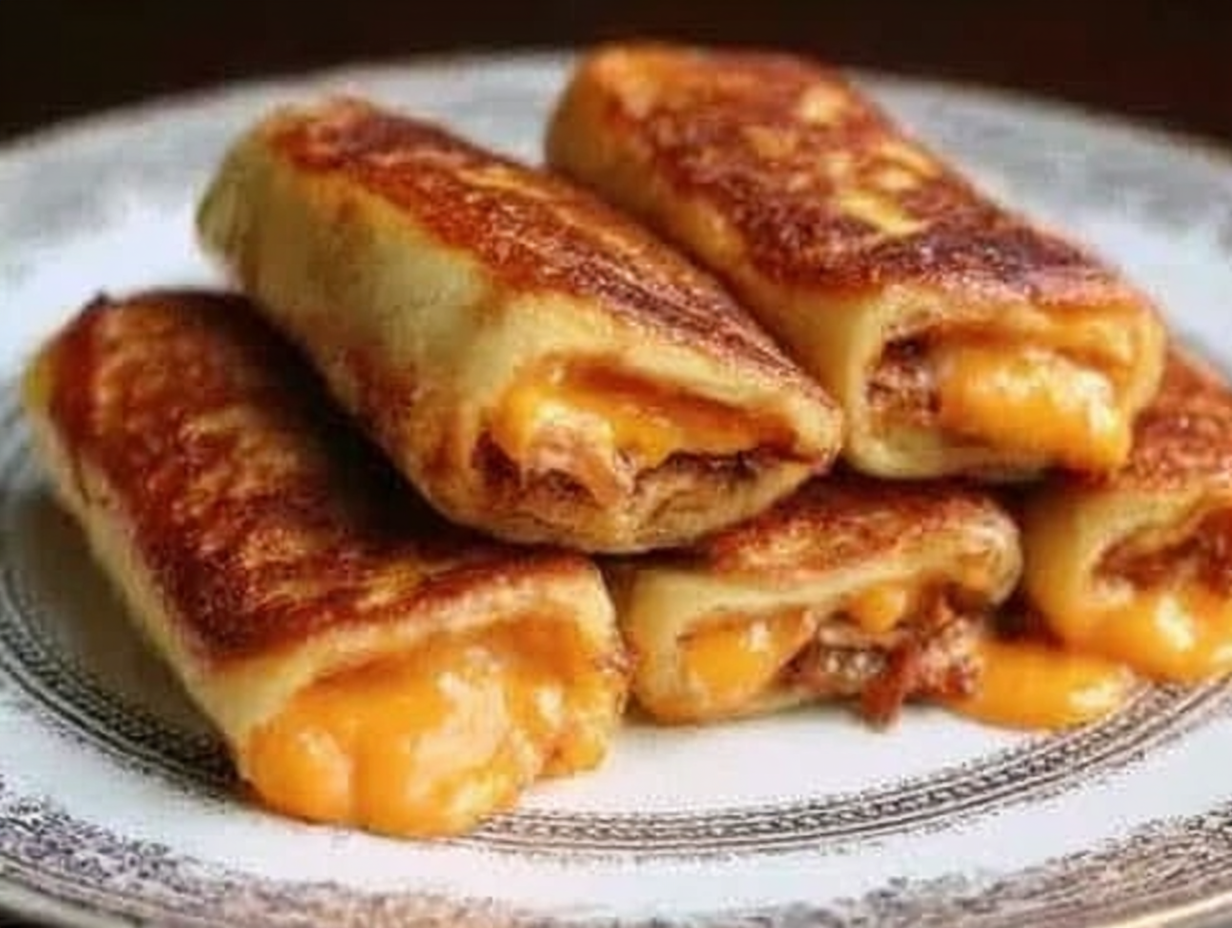
I stumbled upon this idea one afternoon when I wanted to make something a little more exciting for the kids. We had all the classic ingredients, but I wanted to avoid the usual sandwich routine. The moment I rolled up that first piece of flattened bread and cheese and heard it sizzle in the buttery pan, I knew I was onto something. The beauty of these cheese roll ups is their simplicity and the sheer joy they bring. They have all the nostalgic flavor of the original but with an irresistible crunch in every single bite. It’s a simple twist that elevates a classic into a new family favorite, and the process is just as fun as the result.
Ingredients for Grilled Cheese Roll Ups
One of the best things about this Grilled Cheese Roll Ups Recipe is that it requires just a few simple, everyday ingredients. You likely have everything you need in your kitchen right now. The magic isn’t in fancy components, but in the technique of how they come together. You don’t need to be precise with measurements here; it’s more about assembly and feel. Think of this list as a starting point for your own cheesy creations.
- Bread: 8-10 slices of soft white sandwich bread. You’ll be removing the crusts. The softer and fresher the bread, the easier it will be to flatten and roll without it cracking. Basic store-brand white bread is honestly perfect for this job because of how pliable it is.
- Cheese: 8-10 slices of your favorite melting cheese. American cheese is the king of meltiness for that classic flavor. Medium or sharp cheddar adds a great tangy bite, while Monterey Jack is mild and incredibly gooey. Provolone also works wonderfully if you like a little stretch.
- Butter: 4-5 tablespoons of unsalted butter, either softened to room temperature or melted. This is key for getting that perfectly golden-brown, crispy exterior. If you only have salted butter, just be mindful of any other seasonings you might add.
- Optional Seasonings: A little bit of garlic powder (about 1/4 teaspoon) mixed into the butter adds a fantastic savory note. You could also sprinkle a pinch of paprika or dried Italian herbs over the cheese before rolling for extra flavor.
What is the best cheese for melting?
For a recipe like these cheesy roll ups, the best cheese is one that melts smoothly and evenly without becoming greasy or separating. Processed cheeses like American cheese are engineered to do this perfectly, giving you that iconic creamy, liquid-gold texture. However, natural cheeses like young cheddars, Monterey Jack, Colby, low-moisture mozzarella, and Provolone are also fantastic choices that offer more complex flavors while still providing a satisfying melt and cheese pull.
How to Make Grilled Cheese Roll Ups
The process for making these delightful roll ups is straightforward and fun. The most important step is flattening the bread properly, as this is the foundation for a successful roll. Don’t rush this part! Taking a few extra seconds per slice to get it paper-thin will prevent your roll ups from cracking or unrolling in the pan. This is also a great recipe to get kids involved in the kitchen; they’ll love using the rolling pin and rolling up the cheesy bread slices. To make these Grilled Cheese Roll Ups, you’ll first flatten your crustless bread slices with a rolling pin. Then, you’ll place a slice of cheese on the edge, roll it up tightly, brush the outside with melted butter, and pan-fry it until golden brown and crispy on all sides.
- Prep the Bread: Start by trimming the crusts from all your bread slices. Place one slice on a cutting board or clean counter and use a rolling pin to flatten it out as thin as you can, almost like a pancake. This is the crucial step for getting a tight roll. Repeat with all the remaining slices.
- Add the Cheese and Roll: Lay a slice of cheese along one edge of a flattened piece of bread. If you’re using any extra seasonings like herbs, sprinkle them over the cheese now. Tightly roll the bread up around the cheese, starting from the cheese-covered edge.
- Butter Them Up: You have two options here. You can brush the entire outside of each roll-up with melted butter. Or, you can melt the butter directly in your skillet. I prefer brushing them beforehand to ensure even coverage.
- Get Cooking: Heat a non-stick skillet or griddle over medium heat. Carefully place the roll-ups seam-side down in the hot pan. This helps seal the edge right away. Don’t overcrowd the pan; cook in batches if you need to.
- Brown All Sides: Cook for about 2-4 minutes on the first side, until it’s beautifully golden brown and crisp. Then, use tongs to carefully turn the roll-ups, continuing to cook and turn every minute or so until all sides are browned and the cheese inside is completely melted and gooey.
- Serve Immediately: These are at their absolute best when served fresh from the pan. The bread is crispy, the cheese is melty, and they are perfect for dipping!
Tips & Tricks for the Best Grilled Cheese Roll Ups
While this is a simple recipe, a few little tricks can take your Grilled Cheese Roll Ups from good to absolutely unforgettable. It’s all about the details—the texture of the bread, the heat of the pan, and how you handle the rolls. My first batch ever, I didn’t flatten the bread enough, and they were a bit clumsy and wanted to unroll. Lesson learned! The thinner the bread, the tighter the spiral, and the crispier the result. Also, don’t be afraid of a little cheese oozing out. Those crispy, browned cheese bits that form on the pan (sometimes called “frico”) are a delicious bonus.
Mastering the Technique
The real secret to perfect cheese roll ups is managing your heat. If the pan is too hot, the butter and bread will burn before the cheese has a chance to melt. If it’s too low, the bread will absorb too much butter and become soggy rather than crispy. Medium heat is your best friend here. It’s hot enough to create that golden crust while giving the cheese inside enough time to become molten and delicious. Be patient and give them time to brown evenly on all sides. Using tongs makes turning them much easier and helps you get every surface perfectly crispy. And remember to place them seam-side down first; this uses the heat of the pan to seal the roll-up, preventing it from unraveling while you cook.
Why did my roll ups fall apart?
There are usually two culprits if your roll ups are misbehaving. First, the bread wasn’t rolled thin enough. If the bread is still thick and springy, it will naturally want to unroll itself. You need to compress it until it’s flat and dense. Second, you might not be placing them seam-side down in the pan first. That initial contact with the hot, buttery surface is what seals the deal, literally. If you’re still having trouble, you can secure them with a toothpick while cooking, just remember to remove it before serving!
Substitutions & Variations
This Grilled Cheese Roll Ups Recipe is a fantastic canvas for creativity. Once you have the basic technique down, you can experiment with all sorts of fillings and flavors to make them your own. It’s a great way to use up leftover deli meats or different cheeses you have in the fridge. Think of it as a mini, rolled-up version of your favorite gourmet grilled cheese. The key is to not overstuff them. Because they are rolled thin, a small amount of filling goes a long way. Too much, and they’ll be difficult to roll tightly and may become soggy during cooking.
- Add Some Protein: Tuck in a thin slice of deli ham, turkey, or prosciutto along with the cheese before rolling. You could also add a few crumbles of cooked bacon or some very thin slices of pepperoni for a pizza-inspired twist.
- Herb and Spice Blends: Mix things up by adding different seasonings. A sprinkle of everything bagel seasoning on the buttered exterior before cooking is amazing. You could also add a dash of smoked paprika, chili powder, or onion powder to the cheese for a different flavor profile.
- Gourmet Cheeses: Don’t be afraid to experiment with cheese! A combination of Gruyère and a little Parmesan will give you a nutty, savory flavor. Smoked gouda is another fantastic option for a deep, smoky taste. A smear of cream cheese on the bread before adding the sliced cheese can also add a wonderful tangy creaminess.
- Gluten-Free Option: You can absolutely make these with your favorite gluten-free sandwich bread. Just be sure to choose a brand that is soft and pliable, as some GF breads can be more brittle and prone to cracking when rolled.
Can I use different types of bread?
Yes, but with some considerations. The reason soft white sandwich bread is recommended is its high pliability and lack of a tough crust, which makes it easy to flatten and roll without tearing. You can try using a soft whole wheat bread, but be aware that it might be a bit more fragile. Sourdough or other artisan breads are generally not suitable for this recipe as their sturdy structure and open crumb make them very difficult to flatten and roll into a tight cylinder.
Frequently Asked Questions
Can I make grilled cheese roll ups ahead of time?
These are definitely best enjoyed fresh and hot from the skillet. However, you can do some prep work in advance. You can flatten the bread, add the cheese, and roll them up. Store them tightly covered on a plate in the refrigerator for up to a few hours. When you’re ready to eat, just brush with butter and cook as directed. This is a great trick for party prep!
How do I store and reheat leftovers?
If you have any leftovers, store them in an airtight container in the refrigerator for up to 2 days. The bread will soften over time. To reheat and bring back that amazing crispiness, avoid the microwave! The best way is to use an air fryer at around 350°F (175°C) for 3-5 minutes. You can also reheat them in a dry non-stick skillet over medium-low heat until warmed through and crispy again.
What should I serve with these cheesy roll ups?
The absolute classic pairing is a bowl of warm tomato soup for dipping. It’s a match made in comfort food heaven! They are also fantastic on their own as a snack or appetizer. For a more complete meal, you could serve them with a fresh green salad, some raw veggies and dip, or a side of french fries or tater tots.
A Fun Twist on a Comfort Food Classic
This Grilled Cheese Roll Ups Recipe is more than just a meal; it’s a fun experience. It takes a universally loved sandwich and turns it into something interactive and new, without losing any of the cozy, comforting flavors we all crave. They are a testament to the idea that sometimes the simplest changes can make the biggest difference. Whether you’re making them for your family, serving them at a get-together, or just treating yourself to a nostalgic snack, these crispy, gooey roll ups are sure to bring a smile to your face. I hope you give them a try and they become a new favorite in your home, just as they have in mine.

Grilled Cheese Roll Ups Recipe
Ingredients
Equipment
Method
- Prep the Bread: Start by trimming the crusts from all your bread slices. Place one slice on a cutting board or clean counter and use a rolling pin to flatten it out as thin as you can. Repeat with all the remaining slices.
- Add the Cheese and Roll: Lay a slice of cheese along one edge of a flattened piece of bread. If you’re using any extra seasonings, sprinkle them over the cheese. Tightly roll the bread up around the cheese, starting from the cheese-covered edge.
- Butter Them Up: Brush the entire outside of each roll-up with melted butter. Alternatively, melt the butter directly in your skillet.
- Get Cooking: Heat a non-stick skillet or griddle over medium heat. Carefully place the roll-ups seam-side down in the hot pan. Cook in batches if needed to avoid overcrowding.
- Brown All Sides: Cook for about 2-4 minutes on the first side, until golden brown and crisp. Then, use tongs to carefully turn the roll-ups, continuing to cook and turn every minute or so until all sides are browned and the cheese inside is completely melted.
- Serve Immediately: These are best when served fresh from the pan, perfect for dipping.