Some recipes feel like a warm hug, and these cherry pie bars are exactly that for me. They’re a direct line to my grandmother’s kitchen on a lazy summer afternoon, with the windows open and the sweet smell of baking filling the air. This isn’t just any cherry dessert; it’s a treasured family recipe, passed down with love, that turns a simple can of cherry pie filling and a few pantry staples into something truly special. The secret, she always said, was a generous splash of almond extract, which elevates the sweet, tart cherries into an unforgettable treat.
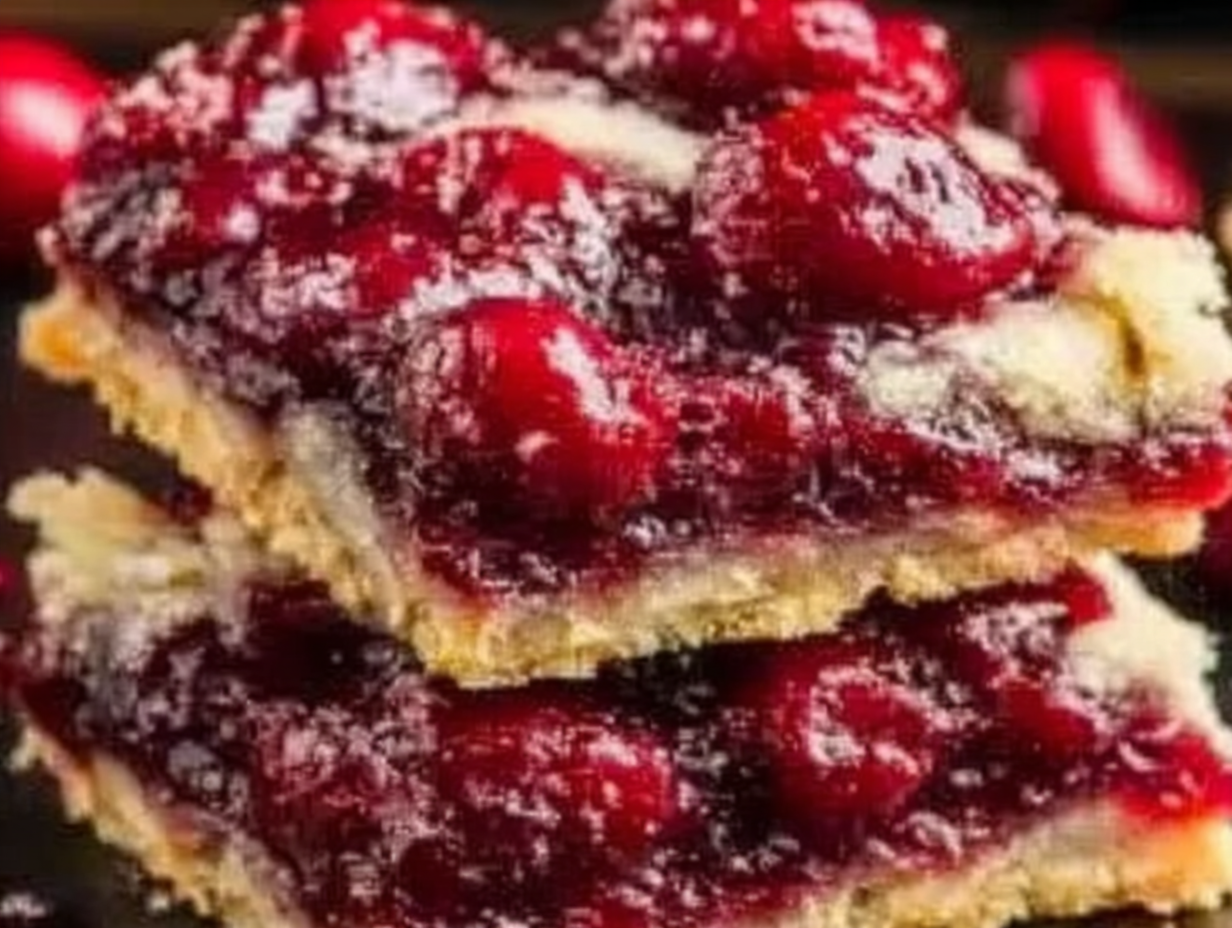
What I love most about this recipe is its simplicity. You get all the delightful flavor of a classic cherry pie but without the fuss of rolling out a traditional crust. The dough is a simple, buttery shortbread that doubles as the base and the crumbly topping. It’s the perfect recipe for when you need a quick cherry dessert that’s guaranteed to impress. Whether you’re a seasoned baker or just starting out, these easy cherry bars are wonderfully forgiving and incredibly rewarding. They’re perfect for potlucks, family gatherings, or just a cozy evening at home when you’re craving something sweet and comforting.
Ingredients for Cherry Pie Bars
- For the Crust and Topping:
- 1 cup unsalted butter, softened to room temperature
- 1 cup granulated sugar
- 2 large eggs, at room temperature
- 1 tsp almond extract
- 1 tsp vanilla extract
- 2 ½ cups all-purpose flour
- ½ tsp salt
- For the Filling:
- 1 (21-ounce) can premium cherry pie filling
- For the Almond Glaze:
- 1 cup confectioners’ sugar
- 1 tsp almond extract
- ½ tsp vanilla extract
- 2-3 tsp milk, or as needed for desired consistency
Step-by-Step Instructions
- Prepare Your Oven and Pan: First things first, preheat your oven to 350°F (175°C). Lightly grease a 9×13 inch baking pan or line it with parchment paper, leaving a little overhang on the sides. The parchment paper trick makes it much easier to lift the bars out for clean slicing later.
- Mix the Wet Ingredients: In a large mixing bowl, using a stand mixer or an electric hand mixer, cream together the softened butter and granulated sugar until the mixture is light and fluffy, about 2-3 minutes. Add the room temperature eggs one at a time, mixing well after each addition. Finally, stir in the almond and vanilla extracts.
- Combine the Dry Ingredients: In a separate bowl, whisk together the all-purpose flour and salt. Gradually add this dry mixture to your wet ingredients, mixing on low speed until just combined. Be careful not to overmix; you want a tender, buttery crust. The dough will be thick and soft.
- Form the Crust: Take about half of the dough and press it evenly into the bottom of your prepared pan. You can use your fingers or the back of a spatula to spread it out. It doesn’t have to be perfect.
- Add the Filling and Topping: Pour the can of cherry pie filling over the bottom crust and spread it out evenly. Take the remaining dough and dollop small spoonfuls over the top of the cherry filling. This creates that lovely, rustic cobbled look.
- Bake to Golden Perfection: Place the pan in your preheated oven and bake for 35–40 minutes. You’ll know the cherry pie bars are done when the top is a light golden brown and the filling is bubbly around the edges.
- Cool Completely: This might be the hardest step! You must let the bars cool completely in the pan on a wire rack. If you try to cut them while they’re still warm, they will fall apart. Patience is key for perfect squares.
- Glaze and Serve: Once the bars are cool, whisk together the confectioners’ sugar, almond extract, vanilla extract, and a few teaspoons of milk in a small bowl. Add milk slowly until you reach a smooth, drizzling consistency. Drizzle the glaze over the bars, let it set for a few minutes, then slice and serve.
Tips & Tricks for the Best Cherry Pie Bars
Over the years, I’ve learned a few little things that take these easy cherry bars from good to absolutely amazing. First, the temperature of your ingredients really matters. Using room temperature butter and eggs allows them to blend together smoothly, creating a uniform, tender texture in the crust. If your butter is too cold, the dough will be lumpy; if it’s too melty, the crust can become greasy. Another tip is to resist the urge to overmix the dough once you add the flour. Mix just until you no longer see streaks of flour. Overworking the dough develops gluten, which can result in a tough, dense crust rather than the light, crumbly shortbread texture we’re aiming for.
When it comes to the topping, don’t try to spread the remaining dough perfectly. The beauty of these bars is the rustic, cobbled look. Simply dropping small spoonfuls of the dough over the cherry filling allows the bright red fruit to peek through after baking, which looks so inviting. Finally, let’s talk about the glaze. For a clean, professional-looking drizzle, pour the glaze into a small zip-top bag, snip off a tiny corner, and pipe it back and forth over the bars. This gives you much more control than using a spoon. And remember, always wait until the bars are completely cool before glazing and slicing. This ensures the glaze sets properly and you get those nice, clean cuts that are perfect for serving.
Why did my crust turn out hard?
A hard or tough crust in these cherry pie bars is almost always due to overmixing the dough. When you mix flour with wet ingredients, you start developing gluten. A little gluten provides structure, but too much makes baked goods tough. To avoid this, mix on low speed only until the flour is just incorporated. The dough should be soft and slightly crumbly. This gentle handling ensures a tender, melt-in-your-mouth shortbread base.
Substitutions & Variations
This recipe is fantastic as is, but it’s also incredibly versatile. While I believe these are the ultimate almond extract cherry bars, you can easily customize them to your liking. If you’re not a fan of almond, you can omit it and use 2 teaspoons of vanilla extract instead. For a brighter, zippier flavor, try adding the zest of one lemon to the dough along with the extracts. It pairs beautifully with the sweet cherries and adds a lovely freshness to this delightful cherry dessert.
Don’t feel limited to cherry! This recipe works wonderfully with other canned pie fillings. Blueberry, apple, or even peach pie filling would be delicious alternatives. If you’re feeling adventurous during the summer months, you can even make your own filling with fresh cherries. For a bit of extra texture, consider adding a half-cup of sliced almonds or rolled oats to the topping dough before dolloping it over the filling. This adds a wonderful crunch that complements the soft, buttery crust. For a gluten-free version, you can try substituting a good-quality measure-for-measure gluten-free flour blend, but be aware that the texture of the crust may be slightly different.
Frequently Asked Questions
Can I use fresh or frozen cherries instead of canned filling?
Yes, you can, but it requires a few extra steps. You’ll need about 4 cups of pitted fresh or frozen (thawed and drained) cherries. In a saucepan, combine the cherries with about 3/4 cup of sugar, 4 tablespoons of cornstarch, and a splash of lemon juice. Cook over medium heat, stirring frequently, until the mixture thickens and becomes bubbly. Let it cool completely before spreading it over the crust.
How do I store these cherry pie bars?
You can store the bars in an airtight container at room temperature for up to 3 days. If you prefer them chilled or if your kitchen is particularly warm, you can store them in the refrigerator for up to a week. They taste great straight from the fridge!
Can I make these bars ahead of time?
Absolutely. These bars are a great make-ahead dessert. You can bake them a day or two in advance. For the best results, wait to add the glaze until you’re ready to serve to keep it from getting soft or weeping. You can also freeze the baked (unglazed) bars for up to 3 months. Just thaw them at room temperature before glazing and serving.
A Sweet Slice of Simplicity
There’s a special kind of joy in creating a dessert that feels both impressive and incredibly simple. Every time I pull a pan of these golden, bubbly cherry pie bars from the oven, I’m reminded of my grandmother and the love she baked into every treat. This recipe is more than just a quick cherry dessert; it’s a connection to the past and a chance to create new memories with the people you love. I hope you’ll give these bars a try and that they bring as much warmth and happiness to your kitchen as they do to mine. They are truly a simple, sweet pleasure meant to be shared.

Cherry Pie Bars
Ingredients
Equipment
Method
- Prepare Your Oven and Pan: First things first, preheat your oven to 350°F (175°C). Lightly grease a 9×13 inch baking pan or line it with parchment paper, leaving a little overhang on the sides. The parchment paper trick makes it much easier to lift the bars out for clean slicing later.
- Mix the Wet Ingredients: In a large mixing bowl, using a stand mixer or an electric hand mixer, cream together the softened butter and granulated sugar until the mixture is light and fluffy, about 2-3 minutes. Add the room temperature eggs one at a time, mixing well after each addition. Finally, stir in the almond and vanilla extracts.
- Combine the Dry Ingredients: In a separate bowl, whisk together the all-purpose flour and salt. Gradually add this dry mixture to your wet ingredients, mixing on low speed until just combined. Be careful not to overmix; you want a tender, buttery crust. The dough will be thick and soft.
- Form the Crust: Take about half of the dough and press it evenly into the bottom of your prepared pan. You can use your fingers or the back of a spatula to spread it out. It doesn’t have to be perfect.
- Add the Filling and Topping: Pour the can of cherry pie filling over the bottom crust and spread it out evenly. Take the remaining dough and dollop small spoonfuls over the top of the cherry filling. This creates that lovely, rustic cobbled look.
- Bake to Golden Perfection: Place the pan in your preheated oven and bake for 35–40 minutes. You’ll know the cherry pie bars are done when the top is a light golden brown and the filling is bubbly around the edges.
- Cool Completely: This might be the hardest step! You must let the bars cool completely in the pan on a wire rack. If you try to cut them while they’re still warm, they will fall apart. Patience is key for perfect squares.
- Glaze and Serve: Once the bars are cool, whisk together the confectioners’ sugar, almond extract, vanilla extract, and a few teaspoons of milk in a small bowl. Add milk slowly until you reach a smooth, drizzling consistency. Drizzle the glaze over the bars, let it set for a few minutes, then slice and serve.