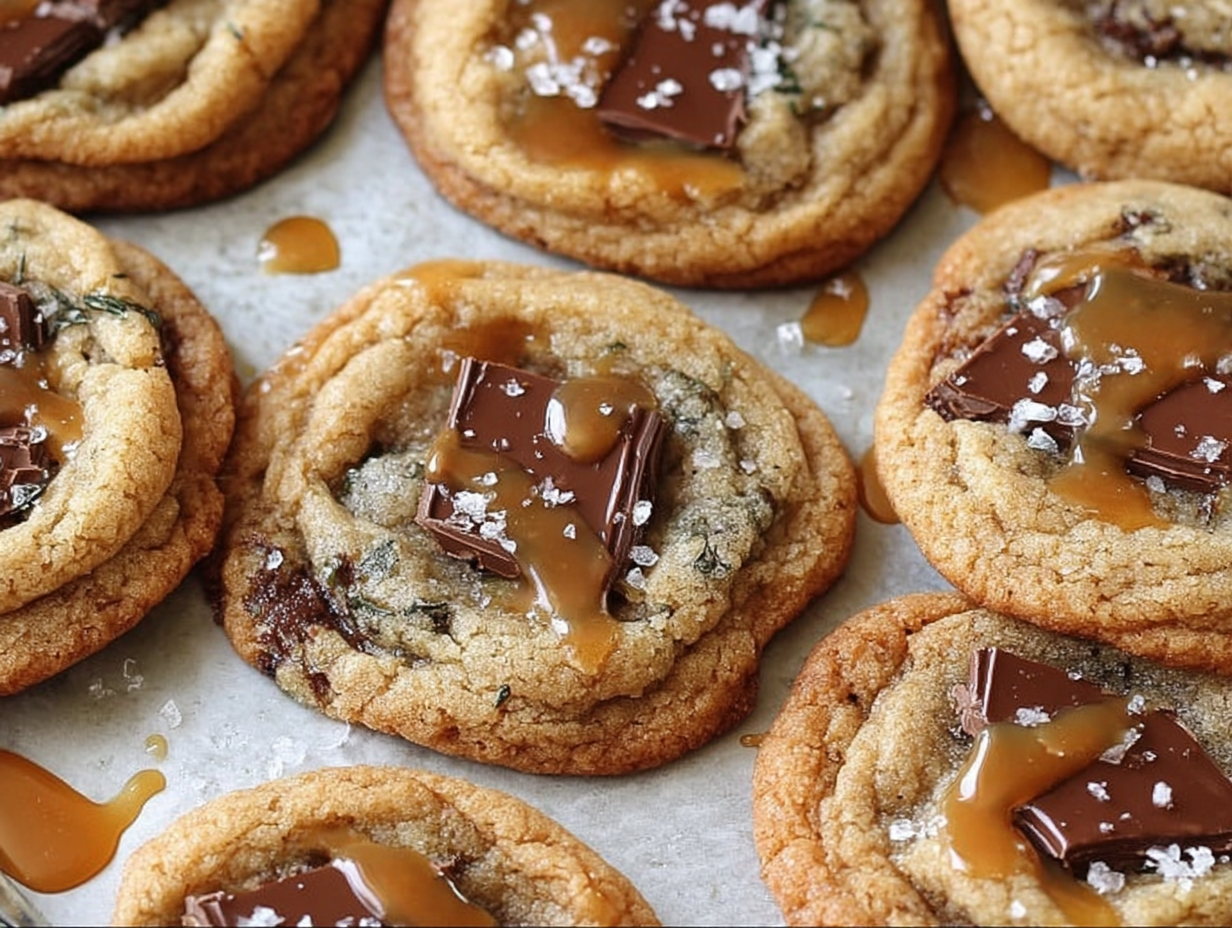
There’s a certain magic that happens when you pull a tray of perfect, golden-brown cookies from the oven. It’s more than just the incredible smell that fills your kitchen; it’s a feeling of pure comfort and accomplishment. This Salted Caramel Cookie Recipe is the embodiment of that feeling for me. It’s the recipe I turn to after a long week, the one I make for friends who need a little pick-me-up, and the one that never, ever fails to produce the most wonderfully soft, chewy, and flavor-packed cookies you can imagine. Forget those flat, disappointing cookies; this recipe delivers that sought-after bakery-style texture with gooey caramel pockets and just the right amount of flaky sea salt to make the flavors sing.
What makes this the best salted caramel cookie recipe isn’t some complicated technique or rare ingredient. It’s about the simple, perfect balance of textures and tastes. The dough itself is rich and buttery, with brown sugar lending a deep, molasses-like sweetness and incredible moisture. Then, you get these wonderful little bursts of melted caramel, complemented by the optional (but highly recommended) chocolate chips. The final sprinkle of flaky sea salt before baking is the secret weapon. It doesn’t just add saltiness; it elevates the caramel, deepens the chocolate, and cuts through the sweetness for a truly addictive finish. This is more than just an easy salted caramel cookie recipe; it’s a blueprint for creating moments of pure, delicious joy, whether you’re a seasoned baker or just starting out.
Ingredients for Salted Caramel Cookies
- All-Purpose Flour: 2 ¼ cups. This is the foundation that gives our cookies their structure.
- Baking Soda: 1 tsp. This gives the cookies a nice lift, keeping them from being too dense.
- Salt: 1 tsp. Essential for balancing the sweetness in the dough itself.
- Unsalted Butter: 1 cup. Make sure it’s softened to room temperature for proper creaming.
- Granulated Sugar: ¾ cup. This contributes to the crisp, golden edges.
- Brown Sugar: ¾ cup. Packed brown sugar is key for moisture, chewiness, and that classic caramel flavor.
- Large Eggs: 2. Bring these to room temperature along with your butter.
- Vanilla Extract: 2 tsp. Use pure vanilla extract for the best, most aromatic flavor.
- Caramel Chips: 1 cup. These create those irresistible pockets of gooey caramel.
- Chocolate Chips: ½ cup. These are optional, but they add a lovely layer of richness. Semi-sweet or dark chocolate works best.
- Flaky Sea Salt: ½ tsp. For sprinkling on top. This is a finishing salt, not for mixing into the dough.
Step-by-Step Instructions
- Prep Your Station: First things first, get your oven preheating to 350°F (175°C). There’s nothing worse than having your dough ready and your oven cold. Line a couple of large baking sheets with parchment paper to prevent any sticking and ensure even baking.
- Combine the Dry Ingredients: In a medium-sized bowl, whisk together the all-purpose flour, baking soda, and salt. Whisking helps distribute the baking soda evenly, so you don’t get any bitter bites. Just set this bowl aside for now.
- Cream Butter and Sugars: In a large bowl with a hand mixer or in the bowl of a stand mixer, beat the softened butter with the granulated and brown sugars. Start on low speed and gradually increase to medium-high. You’ll want to cream them for a good 3-4 minutes until the mixture is light, pale, and fluffy. This step whips air into the dough, which is crucial for a great cookie texture.
- Add Eggs and Vanilla: Beat in your room-temperature eggs, one at a time, mixing well after each addition before adding the next. This helps them incorporate fully. Scrape down the sides of the bowl, then mix in the vanilla extract.
- Combine Wet and Dry: With the mixer on its lowest speed, gradually add the flour mixture to the wet ingredients. Mix only until the last streaks of flour have disappeared. Be careful not to overmix here; overmixing develops gluten and can lead to tough cookies.
- Fold in the Good Stuff: Now for the best part. Gently fold in the caramel chips and the optional chocolate chips using a spatula. This is a key step in making these delicious salted caramel chocolate chip cookies all Recipes talks about.
- Scoop the Dough: Using a cookie scoop or a couple of spoons, drop rounded tablespoons of dough onto your prepared baking sheets. Make sure to leave about 2 inches of space between them, as they will spread.
- The Finishing Touch: Before they go into the oven, sprinkle a tiny pinch of flaky sea salt over the top of each dough ball. This is what makes them true salted caramel cookies.
- Bake to Perfection: Bake for 10-12 minutes. The sweet spot is when the edges are set and golden brown, but the centers still look a little soft. They’ll continue to set on the pan.
- Cool Down: Let the cookies cool on the baking sheet for about 5 minutes. This is an important step; they’ll be too soft to move right away. After 5 minutes, carefully transfer them to a wire rack to cool completely.
Tips & Tricks for the Best Salted Caramel Cookie Recipe
Over the years, I’ve learned that a few small details can take a good cookie and make it truly exceptional. For this Salted Caramel Cookie Recipe, the biggest game-changer is dough temperature. If you find your cookies spread too much, the culprit is almost always butter that was too soft or a warm kitchen. The simple fix? Chill your dough. After scooping the dough onto the parchment-lined sheets, pop the whole tray into the refrigerator for 30 minutes before baking. This solidifies the butter, meaning the cookies spread slower in the oven, resulting in a thicker, chewier cookie. It’s a simple step that guarantees that perfect bakery-style shape and texture every single time.
Another area to focus on is the creaming process. It’s tempting to rush through Step 3, but creaming the butter and sugars for a full 3-4 minutes is non-negotiable for achieving that light, airy texture. You’re not just mixing; you’re incorporating air, which acts as a leavener. You’ll physically see the mixture change from a dense, yellow paste to a pale, fluffy cream. This aeration helps the baking soda do its job, giving the cookies lift and a tender crumb. Rushing this step often leads to denser, heavier cookies. So, set a timer and let your mixer do the work. It’s a small investment of time that pays off in a big way, especially if you’re aiming for that crispy salted caramel cookies recipe edge with a soft center.
Why are my cookies flat?
Flat cookies are a common frustration, but they’re easily preventable. The primary cause is overly soft or melted butter. “Softened” butter should still be cool to the touch and hold its shape. If it’s greasy or melty, it won’t cream properly, and the cookies will spread. Using cold eggs can also shock the creamed butter, causing it to seize up. Always use room temperature ingredients. Finally, as mentioned above, chilling the dough before baking is your best insurance policy against a flat, sad cookie.
Substitutions & Variations
While this recipe is fantastic as is, it’s also a wonderful canvas for creativity. The most obvious swap involves the star ingredient: the caramel. If you can’t find caramel chips, you can chop up soft caramel candies (like Werther’s Soft Caramels). Toss them in a tablespoon of flour before folding them into the dough to prevent them from sticking together and sinking to the bottom. For the chocolate, feel free to experiment! Dark chocolate chunks provide a sophisticated, intense flavor that contrasts beautifully with the sweet caramel. Milk chocolate chips will give you a sweeter, more classic cookie, while white chocolate chips add a creamy, vanilla-like richness. This flexibility is what makes it such an easy caramel cookies recipe to adapt to your personal taste.
Don’t be afraid to play with the dough itself. For a warmer, spiced version perfect for autumn, add half a teaspoon of cinnamon to your dry ingredients. To enhance the nutty, brown-butter notes, you can even brown your butter before creaming it with the sugars. Simply melt the butter in a light-colored pan over medium heat and cook, swirling occasionally, until it foams and brown specks appear at the bottom. Let it cool and solidify to a soft paste before using. This adds an incredible layer of toffee-like depth. For a different texture, swapping out a half-cup of all-purpose flour for bread flour can result in an even chewier cookie due to the higher protein content. These small changes can help you create a signature version of this beloved treat.
Can I make these gluten-free?
Yes, you can adapt this recipe to be gluten-free. The most reliable method is to use a high-quality, measure-for-measure gluten-free flour blend that contains xanthan gum. These blends are designed to replace all-purpose flour at a 1:1 ratio, making the substitution straightforward. Keep in mind that gluten-free doughs can sometimes be a bit drier or crumblier, so ensure your butter and eggs are truly at room temperature to help with cohesion. The final texture might be slightly different—often a little more delicate—but they will still be absolutely delicious.
Salted Caramel Cookie Recipe: Frequently Asked Questions
Can I make the cookie dough ahead of time?
Absolutely! This dough actually gets better with age. You can prepare the dough, cover it tightly, and refrigerate it for up to 72 hours. Chilling the dough not only makes it a convenient make-ahead option but also allows the flour to hydrate more fully, which can lead to a deeper flavor and a chewier texture. When you’re ready to bake, just let the dough sit at room temperature for about 15-20 minutes to soften slightly, then scoop and bake as directed, perhaps adding an extra minute to the baking time.
How should I store these cookies?
To keep your salted caramel cookies soft and chewy, store them in an airtight container at room temperature. They will stay fresh for up to 5 days. If you find them starting to get a little firm after a couple of days, you can add a slice of sandwich bread to the container. The cookies will absorb moisture from the bread, helping them stay soft.
Can I freeze the cookies or the dough?
Yes, both the baked cookies and the raw dough freeze beautifully. To freeze the dough, scoop it into balls and place them on a baking sheet. Freeze until solid, then transfer the frozen dough balls to a zip-top freezer bag. They can be baked directly from frozen; just add 2-3 minutes to the baking time. To freeze baked cookies, let them cool completely, then store them in an airtight, freezer-safe container, separating layers with parchment paper. They’ll keep for up to 3 months.
The Only Salted Caramel Cookie Recipe You’ll Ever Need
There you have it—a truly reliable and incredibly delicious Salted Caramel Cookie Recipe that I hope finds a permanent place in your recipe box. The beauty of this recipe is in its perfect harmony of sweet, salty, chewy, and rich. It’s a cookie that feels special enough for a celebration but is simple enough for a spontaneous Tuesday afternoon baking session. Seeing these golden-brown beauties come out of the oven, with their gooey caramel centers and sparkling salt tops, is a reward in itself. I encourage you to try this recipe, share it with people you love, and make it your own. It’s more than just a cookie; it’s a little piece of homemade happiness, and I’m certain it will become your family’s best salted caramel cookie recipe too.

Salted Caramel Cookie Recipe
Ingredients
Equipment
Method
- Prep Your Station: Preheat your oven to 350°F (175°C). Line a couple of large baking sheets with parchment paper.
- Combine the Dry Ingredients: In a medium-sized bowl, whisk together the all-purpose flour, baking soda, and salt. Set aside.
- Cream Butter and Sugars: In a large bowl, beat the softened butter with the granulated and brown sugars on medium-high for 3-4 minutes until light, pale, and fluffy.
- Add Eggs and Vanilla: Beat in the eggs one at a time, mixing well after each. Scrape down the sides of the bowl, then mix in the vanilla extract.
- Combine Wet and Dry: With the mixer on low speed, gradually add the flour mixture to the wet ingredients. Mix only until the last streaks of flour have disappeared. Do not overmix.
- Fold in the Good Stuff: Gently fold in the caramel chips and the optional chocolate chips using a spatula.
- Scoop the Dough: Drop rounded tablespoons of dough onto the prepared baking sheets, leaving about 2 inches of space between them.
- The Finishing Touch: Sprinkle a tiny pinch of flaky sea salt over the top of each dough ball.
- Bake to Perfection: Bake for 10-12 minutes, until the edges are set and golden brown, but the centers still look slightly soft.
- Cool Down: Let the cookies cool on the baking sheet for 5 minutes before transferring them to a wire rack to cool completely.