There’s a certain kind of magic that lives in the memory of a truly great old-fashioned donut. It’s the slightly crisp exterior giving way to a soft, cakey crumb, the subtle tang of buttermilk, and that sweet, crackly glaze that melts in your mouth. For years, I thought that experience was reserved for weekend trips to a special bakery. These Old Fashioned Buttermilk Donut Bars are my way of bringing that magic right into my own kitchen, without the fuss of rolling and cutting individual donuts. It’s one of those yummy recipes to make when you want pure, unadulterated comfort in a wonderfully simple bar format.
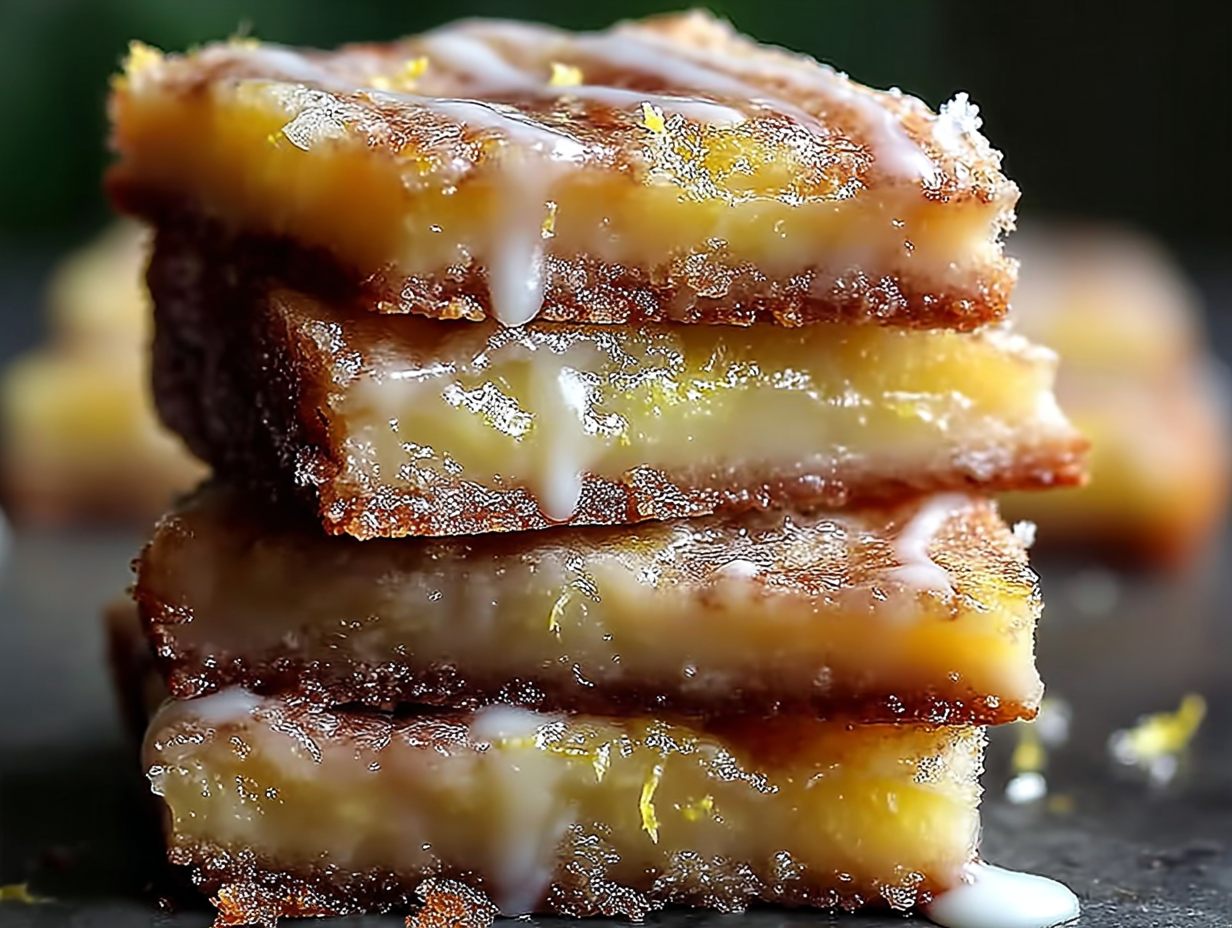
This recipe transforms the classic donut into something more approachable and shareable. Forget wrestling with donut cutters; a simple knife or pizza wheel is all you need. The result is a batch of beautiful, rectangular bars that fry up golden and puff into glorious pillows of doughy goodness. They carry all the nostalgic flavor I crave—the warmth of nutmeg, the richness of real vanilla, and that signature buttermilk tang. While some mornings I might get creative with pancake cinnamon rolls, there are times when only the pure, classic flavor of a buttermilk donut will do. These bars deliver that every single time, making any morning feel a little more special.
Ingredients for Old Fashioned Buttermilk Donut Bars
The beauty of this recipe lies in its simple, classic pantry staples. The real stars are the buttermilk, which gives the donut bars their signature tang and tender texture, and a hint of freshly grated nutmeg for that authentic, old-fashioned bakery aroma. Having everything measured and ready to go makes the process smooth and enjoyable.
For the Donut Bars:
- ½ cup (113g) unsalted butter, softened
- 1 ¼ cups (250g) granulated sugar
- 2 large eggs, at room temperature
- 1 tsp pure vanilla extract
- 4 ½ cups (540g) all-purpose flour
- 1 ½ tsp baking powder
- 1 tsp baking soda
- ¾ tsp salt
- ½ tsp freshly grated nutmeg
- 1 ½ cups (360ml) buttermilk
- Vegetable oil or canola oil, for deep frying
For the Simple Vanilla Glaze:
- 4 cups (480g) confectioners’ sugar, sifted
- ½ cup (120ml) whole milk or heavy cream
- 1 ½ tsp pure vanilla extract
- ¼ tsp salt
How to Make Old Fashioned Buttermilk Donut Bars
Making these donut bars is a surprisingly calming process. The key is not to rush, especially when it comes to chilling the dough—it’s the secret to a tender crumb and easy handling. Just follow these steps, and you’ll have a tray of warm, glazed donut bars ready to be devoured. This method is far more straightforward than trying to assemble a complex pancake recipe cinnamon roll, but just as rewarding.
- Combine Dry Ingredients: In a large bowl, whisk together the all-purpose flour, baking powder, baking soda, salt, and freshly grated nutmeg. Set this aside for later.
- Cream Butter and Sugar: In the bowl of a stand mixer fitted with the paddle attachment, cream the softened butter and granulated sugar on medium speed. Let it go for a good 3-5 minutes until the mixture is light, fluffy, and noticeably paler in color.
- Add Eggs and Vanilla: Add the eggs one at a time, making sure to beat well after each addition. Scrape down the sides of the bowl as needed to ensure everything is incorporated. Stir in the vanilla extract.
- Alternate Wet and Dry: With the mixer on low speed, begin adding the dry ingredient mixture in three parts, alternating with the buttermilk in two parts. Start and end with the dry ingredients. Mix only until the last streaks of flour disappear. The dough will be very soft and sticky—this is exactly what you want!
- Chill the Dough: Turn the dough out onto a lightly floured surface and gently form it into a disc or rectangle. Wrap it tightly in plastic wrap and refrigerate for at least 2 hours, but overnight is even better. This step is essential; don’t skip it!
- Roll and Cut: Lightly flour your work surface, your rolling pin, and your hands. Roll the chilled dough into a large rectangle about ½ inch thick. Try to keep the thickness as even as possible. Using a sharp knife or a pizza cutter, slice the dough into rectangular bars, roughly 1 inch wide and 3-4 inches long.
- Heat the Oil: In a large, heavy-bottomed pot or Dutch oven, pour in enough oil to reach a depth of 3-4 inches. Attach a deep-fry thermometer and heat the oil over medium-high heat until it reaches 350°F (175°C). Maintaining this temperature is crucial for donuts that are cooked through but not greasy.
- Fry the Donut Bars: Working in batches, carefully lower 3-4 donut bars into the hot oil. Don’t overcrowd the pot. Fry for about 1-2 minutes per side, until they are beautifully golden brown and puffed up.
- Drain and Cool: Use a slotted spoon or spider strainer to remove the cooked donut bars from the oil, allowing any excess to drip off. Transfer them to a wire rack set over a baking sheet to drain and cool slightly.
- Make the Glaze: While the donuts are cooling a bit, whisk together the sifted confectioners’ sugar, milk or cream, vanilla extract, and salt in a medium bowl until you have a smooth, pourable glaze.
- Glaze and Set: Dip each warm (not piping hot) donut bar into the glaze, coating at least one side. Place the glazed bars back on the wire rack and let the glaze set for about 15-30 minutes before serving.
Tips & Tricks for the Best Old Fashioned Buttermilk Donut Bars
After making these bars more times than I can count, I’ve picked up a few little secrets that make a big difference. These aren’t just instructions; they’re the kind of advice a friend would give you over a cup of coffee. Following these tips will help you get that perfect bakery-quality result at home, turning this into one of your go-to homemade breakfast pancakes alternatives.
The Chill is Non-Negotiable
I know it’s tempting to skip the chilling time, but please trust me on this one. The dough is incredibly soft and sticky right after mixing. Chilling solidifies the butter and allows the flour to fully hydrate, which does two things: it makes the dough manageable enough to roll and cut, and it develops a deeper, more complex flavor. An overnight chill is my preference, as it makes the dough a dream to work with and results in the most tender donut bars imaginable.
Master Your Oil Temperature
A deep-fry thermometer is your best friend here. If the oil is too cool (below 340°F), the donuts will absorb too much oil and become heavy and greasy. If it’s too hot (above 365°F), the outside will brown too quickly, leaving the inside raw and doughy. Keep a close eye on the thermometer and adjust your stove’s heat between batches to stay in that sweet spot of 350°F.
Why did my glaze slide right off?
This usually happens for one of two reasons: the donut bars were too hot, or the glaze was too thin. Let the bars cool for at least 5-10 minutes after frying. They should be warm enough for the glaze to adhere beautifully but not so hot that it melts and runs off completely. If your glaze seems too thin, simply whisk in a little more sifted confectioners’ sugar until it reaches a thicker, yet still dip-able, consistency.
Substitutions & Variations for Your Donut Bars
One of the best parts about a simple recipe like this is how easily you can adapt it. Whether you’re looking to add a little spice or accommodate a dietary need, these donut bars are wonderfully flexible. If you’re a fan of recipes with cinnamon, you’re in for a treat with some of these variations.
- Cinnamon-Sugar Coating: For a different vibe, skip the glaze. While the bars are still hot, toss them in a mixture of granulated sugar and a generous amount of cinnamon. This is a fantastic option for those who love classic recipes with cinnamon.
- Flavorful Glazes: The vanilla glaze is classic, but feel free to experiment! Try a maple glaze by swapping the vanilla extract for maple extract and using a splash of maple syrup. A chocolate glaze made with cocoa powder and a little melted butter is also divine.
- Citrus Zest: Add the zest of one lemon or orange to the butter and sugar mixture when creaming. This adds a bright, fresh note that cuts through the richness beautifully.
- DIY Buttermilk: If you don’t have buttermilk, you can make a quick substitute. Add 1 ½ tablespoons of lemon juice or white vinegar to a measuring cup, then fill it with whole milk to the 1 ½ cup line. Let it sit for 5-10 minutes to curdle slightly before using.
Frequently Asked Questions
Can I make these donut bars in an air fryer or oven?
You can, but the result will be quite different. Deep frying is what gives these bars their signature light, airy texture and slightly crisp exterior. Baking or air frying them will result in a texture that is more like a dense, soft cake or scone. If you’d like to try it, I suggest baking at 375°F (190°C) for 12-15 minutes or air frying at 350°F (175°C) for 8-10 minutes, flipping halfway through.
How should I store leftovers?
These Old Fashioned Buttermilk Donut Bars are definitely best enjoyed the day they are made. However, you can store any leftovers in an airtight container at room temperature for up to 2 days. The glaze may become a bit softer, but they will still be delicious. I do not recommend refrigerating them, as it can make them taste stale.
Can I make the dough ahead of time?
Absolutely! In fact, I encourage it. The dough can be made and kept tightly wrapped in the refrigerator for up to 48 hours. This not only makes the process easier on the day you want to fry them but also enhances the tangy buttermilk flavor. It’s a great way to prep for a special breakfast or brunch.
The Perfect End to Your Donut Bar Journey
There is something so deeply satisfying about pulling a batch of these golden, puffy donut bars from the hot oil. The kitchen fills with that unmistakable scent of a bakery, and the simple act of dipping each warm bar into the sweet glaze feels like a celebration. This recipe is more than just a set of instructions; it’s an invitation to slow down and create a moment of pure, delicious joy. It’s the perfect treat to serve at a gathering or to savor with a cup of coffee for a truly indulgent morning, perhaps even alongside a classic breakfast with pancakes and syrup for the ultimate feast. I hope these Old Fashioned Buttermilk Donut Bars bring a little bit of that old-school magic into your home and become a cherished recipe for years to come.

Old Fashioned Buttermilk Donut Bars
Ingredients
Equipment
Method
- Combine Dry Ingredients: In a large bowl, whisk together the all-purpose flour, baking powder, baking soda, salt, and freshly grated nutmeg. Set this aside for later.
- Cream Butter and Sugar: In the bowl of a stand mixer fitted with the paddle attachment, cream the softened butter and granulated sugar on medium speed. Let it go for a good 3-5 minutes until the mixture is light, fluffy, and noticeably paler in color.
- Add Eggs and Vanilla: Add the eggs one at a time, making sure to beat well after each addition. Scrape down the sides of the bowl as needed to ensure everything is incorporated. Stir in the vanilla extract.
- Alternate Wet and Dry: With the mixer on low speed, begin adding the dry ingredient mixture in three parts, alternating with the buttermilk in two parts. Start and end with the dry ingredients. Mix only until the last streaks of flour disappear. The dough will be very soft and sticky—this is exactly what you want!
- Chill the Dough: Turn the dough out onto a lightly floured surface and gently form it into a disc or rectangle. Wrap it tightly in plastic wrap and refrigerate for at least 2 hours, but overnight is even better. This step is essential; don’t skip it!
- Roll and Cut: Lightly flour your work surface, your rolling pin, and your hands. Roll the chilled dough into a large rectangle about ½ inch thick. Try to keep the thickness as even as possible. Using a sharp knife or a pizza cutter, slice the dough into rectangular bars, roughly 1 inch wide and 3-4 inches long.
- Heat the Oil: In a large, heavy-bottomed pot or Dutch oven, pour in enough oil to reach a depth of 3-4 inches. Attach a deep-fry thermometer and heat the oil over medium-high heat until it reaches 350°F (175°C). Maintaining this temperature is crucial for donuts that are cooked through but not greasy.
- Fry the Donut Bars: Working in batches, carefully lower 3-4 donut bars into the hot oil. Don’t overcrowd the pot. Fry for about 1-2 minutes per side, until they are beautifully golden brown and puffed up.
- Drain and Cool: Use a slotted spoon or spider strainer to remove the cooked donut bars from the oil, allowing any excess to drip off. Transfer them to a wire rack set over a baking sheet to drain and cool slightly.
- Make the Glaze: While the donuts are cooling a bit, whisk together the sifted confectioners’ sugar, milk or cream, vanilla extract, and salt in a medium bowl until you have a smooth, pourable glaze.
- Glaze and Set: Dip each warm (not piping hot) donut bar into the glaze, coating at least one side. Place the glazed bars back on the wire rack and let the glaze set for about 15-30 minutes before serving.