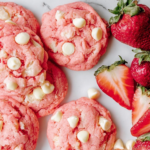
There’s something truly special about creating a treat for Valentine’s Day that looks as good as it tastes. For me, these Valentine’s Day Swirl Cookies are the perfect project. They aren’t just cookies; they’re little tokens of affection, a sweet way to show someone you care. I still remember the first time I tried a pinwheel cookie recipe. I was a bit intimidated by the swirl, worried it would be too complicated and that my kitchen would end up a mess. But the process was surprisingly calming, almost therapeutic. There’s a certain magic in watching two simple blocks of colored dough come together to create such a beautiful, intricate pattern. It feels like you’ve created a tiny work of art, and the smiles you get when you share them are absolutely priceless.
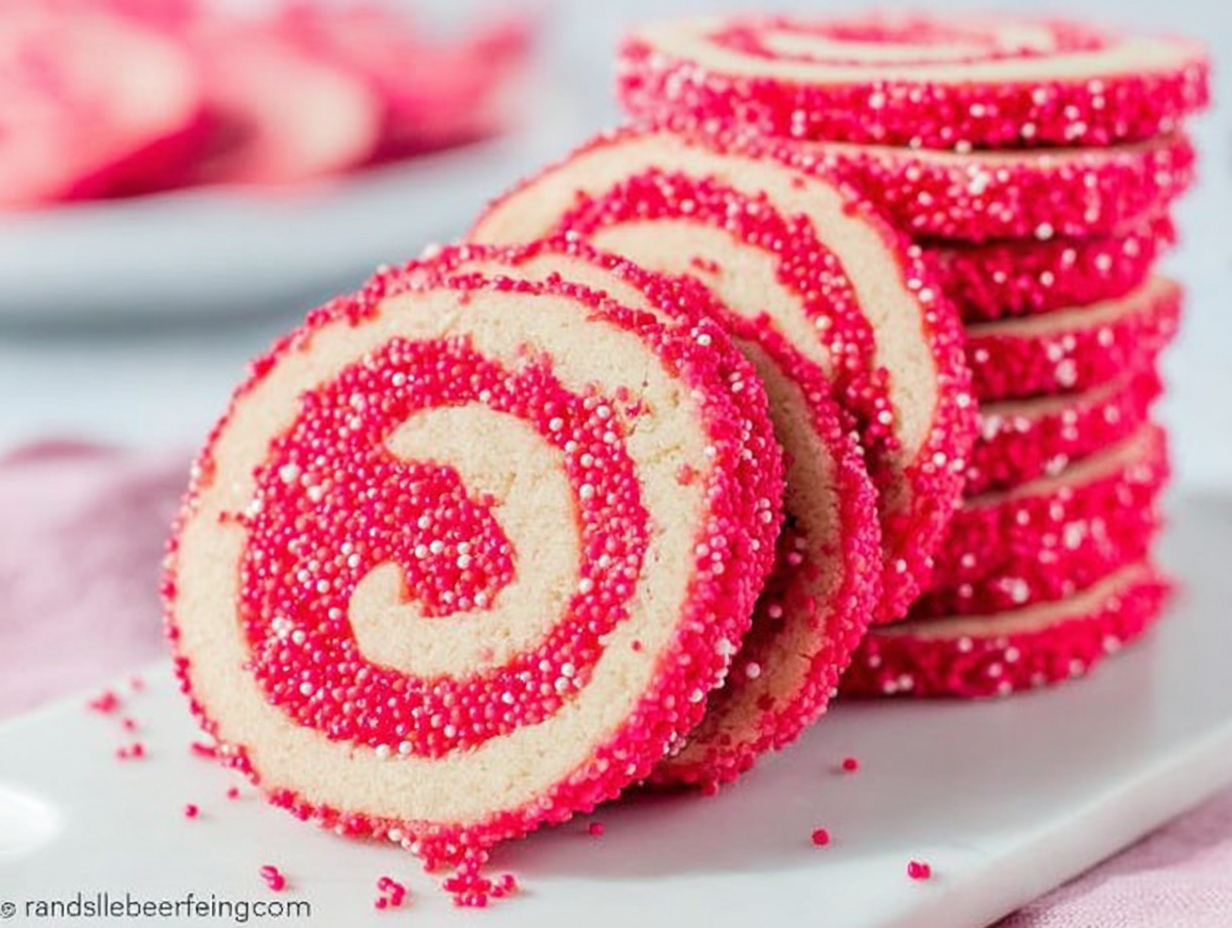
What I love most about this recipe is its simplicity disguised as elegance. At its heart, it’s a classic, buttery sugar cookie dough that’s incredibly forgiving and delicious. The magic is all in the technique—coloring, chilling, rolling, and slicing. It’s a fun weekend baking project, perfect for getting kids involved or for just spending a quiet afternoon creating something lovely. These cookies are more than just a dessert; they’re a centerpiece for a celebration of love, whether it’s for a partner, your friends, or just a sweet act of self-care. The vibrant red swirl against the pale vanilla dough, all covered in festive sprinkles, just screams Valentine’s Day. They look like they came from a fancy bakery, but you’ll know the secret is just a little bit of patience and a whole lot of love baked right in.
Ingredients for Valentine’s Day Swirl Cookies
- 2 cups all-purpose flour, plus a few extra tablespoons for dusting
- 1/2 teaspoon baking powder
- 1/4 teaspoon salt
- 2/3 cup unsifted powdered sugar
- 1/4 cup granulated sugar
- 1 1/4 cups (2 1/2 sticks) unsalted butter, softened and cut into chunks
- 1 teaspoon pure vanilla extract
- 1/2 teaspoon red or pink food coloring (gel works best)
- Optional: 1/2 teaspoon additional extract, like almond or strawberry
- 1 1/2 cups Valentine’s Day sprinkles
How to Make Your Valentine’s Day Swirl Cookies
- Prepare the Dough Base: In a large mixing bowl or the bowl of a stand mixer, combine the flour, baking powder, and salt. In a separate bowl, beat the softened butter with the powdered sugar and granulated sugar until the mixture is light and fluffy, about 2-3 minutes. Beat in the vanilla extract. Gradually add the dry ingredient mixture to the butter mixture, mixing on low speed until the dough just starts to come together.
- Divide and Color: Once the dough begins to form a cohesive ball, stop the mixer. Remove the dough and place it on a lightly floured surface. Divide it into two equal halves. Place one half back into the mixer bowl.
- Add the Color: Add the food coloring and any optional extra extracts to the dough in the mixer. Mix on low speed until the color is evenly distributed throughout. Be careful not to overmix.
- Roll Out the Dough: Take one portion of dough (either white or colored) and place it between two large sheets of wax paper. Roll it out into a rectangle that is roughly 11 by 9 inches and about 1/4 inch thick. Repeat the process with the second portion of dough.
- Chill the Dough Sheets: Carefully slide both rolled-out dough sheets (still between the wax paper) onto a large baking sheet. Place them in the refrigerator to chill for at least one hour. The dough must be firm to the touch.
- Stack the Layers: Once chilled, remove the dough from the refrigerator. Peel the top sheet of wax paper off both rectangles. Lightly brush the surface of the uncolored vanilla dough with a little water—this acts as a glue. Carefully lift the colored dough sheet and flip it over, placing it directly on top of the vanilla dough. Gently press them together and peel off the final sheet of wax paper.
- Trim and Roll: Use a small knife or a pastry wheel to trim the edges of the stacked dough, creating a neat rectangle. With a long side facing you, begin tightly rolling the dough into a log, jelly-roll style. Try to roll evenly to create a perfect swirl for your Valentine’s Day Swirl Cookies.
- Add the Sprinkles: Pour your holiday sprinkles onto a large platter or a clean baking sheet. Gently lift your dough log and roll it in the sprinkles, pressing lightly to make sure they adhere to the entire surface.
- Final Chill: Tightly wrap the sprinkle-covered log in plastic wrap. Chill for at least 2 hours, or until very firm. At this point, you can also freeze the dough for up to three months.
- Slice and Bake: Preheat your oven to 350°F (175°C). Line baking sheets with parchment paper. Unwrap the chilled log and use a sharp knife to slice it into 1/4-inch thick rounds. Place the cookies about 2 inches apart on the prepared baking sheets.
- Bake to Perfection: Bake for 15 to 17 minutes, or until the edges are just beginning to turn a light golden brown. Let the cookies cool on the baking sheet for about 5 minutes before transferring them to a wire rack to cool completely.
Tips & Tricks for the Perfect Pinwheel Cookie Recipe
Making a successful pinwheel cookie recipe comes down to a few key details that can make a world of difference. The most important tip I can offer is to respect the chilling times. It might feel tedious to wait, but chilling is non-negotiable. When the dough is cold, it’s much easier to handle, stack, and roll without stretching or tearing. More importantly, a properly chilled dough log will allow you to slice clean, perfect rounds. If you try to slice warm, soft dough, it will squash and you’ll lose that beautiful swirl definition. The same goes for baking; popping cold dough into the oven helps the cookies hold their shape and prevents them from spreading into thin, crispy blobs. If your kitchen is warm, don’t hesitate to pop the dough log back into the freezer for 10-15 minutes if it starts to feel soft while you’re slicing.
Even Rolling for a Perfect Swirl
The secret to a uniform, beautiful swirl in your Valentine’s Day Swirl Cookies is rolling the dough to an even thickness. The wax paper trick is your best friend here. It prevents the dough from sticking to the rolling pin and your countertop, meaning you won’t need to add a lot of extra flour, which can dry out the cookies. To ensure an even thickness, you can use rolling pin guides or simply eyeball it, rotating the dough as you go. When you stack the two colored layers, make sure they are aligned as closely as possible before trimming. A clean, straight edge makes the rolling process much neater and helps create a tight, uniform log. When you begin to roll the log, start with a tight fold and use your fingertips to keep consistent pressure all the way across.
Question: Why did my cookies lose their swirl shape when baking?
This is a common frustration, and it almost always comes back to dough temperature. If your cookies spread too much and the swirl becomes distorted, it’s a sign the butter in the dough got too warm before it went into the oven. Ensure your dough log is thoroughly chilled before slicing—it should be very firm. After slicing, if you’ve handled the cookies a lot, you can even place the baking sheet with the sliced cookies into the refrigerator for another 15 minutes before baking. This extra chill gives the cookies the best possible chance of maintaining that gorgeous, sharp swirl you worked so hard to create.
Substitutions & Variations
While this recipe is perfect for Valentine’s Day, it’s also incredibly versatile and can be adapted for any occasion or flavor preference. The beauty of this pinwheel cookie recipe is that it’s a blank canvas for your creativity. Don’t feel locked into red and white! You can easily swap the red food coloring for green for St. Patrick’s Day, or use a combination of red and green for Christmas. Orange and black would be fantastic for Halloween. The possibilities are truly endless, so feel free to match the colors to your favorite holiday, sports team, or party theme.
Flavor Twists
The vanilla base is classic and delicious, but you can easily introduce new flavors. Try adding 1/2 teaspoon of almond extract to the white dough for a cherry-almond flavor profile that pairs beautifully with the vanilla. Peppermint extract is a wonderful addition for Christmas-themed cookies. You could also add finely grated citrus zest, like lemon or orange, to one or both of the doughs for a bright, fresh taste. For a richer flavor, consider adding a tablespoon of cocoa powder to the colored dough portion to create a chocolate and vanilla swirl. Just remember to add any extra extracts when you add the food coloring to ensure it gets mixed in evenly.
Frequently Asked Questions
Can I make the dough ahead of time?
Absolutely! This dough is perfect for making ahead. You can prepare the dough log, wrap it tightly in plastic wrap, and store it in the refrigerator for up to 3 days. For longer storage, the wrapped dough log can be placed in a freezer-safe bag and frozen for up to 3 months. When you’re ready to bake, simply thaw the log in the refrigerator for a few hours (or on the counter for about an hour) until it’s just soft enough to slice, then bake as directed.
My dough log cracked when I tried to roll it. What did I do wrong?
If your stacked dough cracks as you begin to roll it, it’s likely a bit too cold and firm. The ideal state for rolling is chilled and firm, but still pliable. If you encounter cracking, just let the dough sit at room temperature for 5-10 minutes to soften up slightly. This should make it flexible enough to roll into a log without breaking.
What’s the best way to get perfectly round cookies?
When you first roll the dough into a log, it will be perfectly round. However, as it chills in the refrigerator, the side it rests on can become slightly flattened. To avoid this, you can give the log a quarter turn every 20-30 minutes for the first hour of chilling. This helps it set in a more uniform cylindrical shape, leading to rounder cookies when you slice it.
A Sweet Conclusion to Your Baking
There you have it—a simple, delightful path to creating the most charming Valentine’s Day Swirl Cookies. I hope you find as much joy in the process as you do in the final result. There’s a special kind of satisfaction that comes from slicing into that chilled log and seeing the perfect swirl you created reveal itself in each cookie. It’s a testament to the idea that with a little patience, simple ingredients can be transformed into something truly spectacular. Whether you’re baking these for a loved one, sharing them with friends, or simply treating yourself, these cookies are a wonderful way to celebrate the sweet moments in life. So go ahead, give this pinwheel cookie recipe a try, and share a little bit of homemade happiness.

Valentine’s Day Swirl Cookies
Ingredients
Equipment
Method
- Prepare the Dough Base: In a large mixing bowl or the bowl of a stand mixer, combine the flour, baking powder, and salt. In a separate bowl, beat the softened butter with the powdered sugar and granulated sugar until the mixture is light and fluffy, about 2-3 minutes. Beat in the vanilla extract. Gradually add the dry ingredient mixture to the butter mixture, mixing on low speed until the dough just starts to come together.
- Divide and Color: Once the dough begins to form a cohesive ball, stop the mixer. Remove the dough and place it on a lightly floured surface. Divide it into two equal halves. Place one half back into the mixer bowl.
- Add the Color: Add the food coloring and any optional extra extracts to the dough in the mixer. Mix on low speed until the color is evenly distributed throughout. Be careful not to overmix.
- Roll Out the Dough: Take one portion of dough (either white or colored) and place it between two large sheets of wax paper. Roll it out into a rectangle that is roughly 11 by 9 inches and about 1/4 inch thick. Repeat the process with the second portion of dough.
- Chill the Dough Sheets: Carefully slide both rolled-out dough sheets (still between the wax paper) onto a large baking sheet. Place them in the refrigerator to chill for at least one hour. The dough must be firm to the touch.
- Stack the Layers: Once chilled, remove the dough from the refrigerator. Peel the top sheet of wax paper off both rectangles. Lightly brush the surface of the uncolored vanilla dough with a little water—this acts as a glue. Carefully lift the colored dough sheet and flip it over, placing it directly on top of the vanilla dough. Gently press them together and peel off the final sheet of wax paper.
- Trim and Roll: Use a small knife or a pastry wheel to trim the edges of the stacked dough, creating a neat rectangle. With a long side facing you, begin tightly rolling the dough into a log, jelly-roll style. Try to roll evenly to create a perfect swirl for your Valentine’s Day Swirl Cookies.
- Add the Sprinkles: Pour your holiday sprinkles onto a large platter or a clean baking sheet. Gently lift your dough log and roll it in the sprinkles, pressing lightly to make sure they adhere to the entire surface.
- Final Chill: Tightly wrap the sprinkle-covered log in plastic wrap. Chill for at least 2 hours, or until very firm. At this point, you can also freeze the dough for up to three months.
- Slice and Bake: Preheat your oven to 350°F (175°C). Line baking sheets with parchment paper. Unwrap the chilled log and use a sharp knife to slice it into 1/4-inch thick rounds. Place the cookies about 2 inches apart on the prepared baking sheets.
- Bake to Perfection: Bake for 15 to 17 minutes, or until the edges are just beginning to turn a light golden brown. Let the cookies cool on the baking sheet for about 5 minutes before transferring them to a wire rack to cool completely.